Applies To:
KnowledgeSmart Principal Administrators.
Common Causes/Issues:
You want to understand how to create a new KnowledgeSmart admin account and to understand the logic for viewing and navigating linked accounts and amending account Settings.
Solution Overview:
You have a need to create one or more linked KnowledgeSmart accounts, so that you can manage your Skills assessment, Survey and Skills audit data in more than one place.
There are a number of reasons why you might want to have more than one admin dashboard. These include:
- You want separate accounts for different geographical locations, studios or offices. This might include international, national and/or regional data.
- You want to separate your data by industry discipline or business unit.
- You want to capture data for a special project or event, and keep this data separate from your other accounts.
Creating linked accounts enables you to compartmentalize your users, invites and results data, so that you control which people can (or can't) view data for certain parts of your organization.
Setting up a new account
Make sure you first confirm which account you are currently logged into, as the new account will display directly beneath this account in your account hierarchy.
Step 1
Go to Accounts > Add new account and enter the details for the new linked account.
Mandatory fields include: Account name, Admin First name, Admin Last name and Admin Email address.

Choose which type of administrator you wish to assign to the new account. This article explains the different types of KnowledgeSmart administrator.
Choose which account settings you wish to apply to your new account, using the appropriate checkboxes. These include:
- Test feedback
- Branding
- User datafields
- UI options
- Self-invite options
Select 'Send welcome email' to send a confirmation email to the new account administrator.
Click 'Continue' to proceed to the next stage of your new account setup.
Step 2
Select which Skills assessment library titles you wish to assign to your new account.
Click 'Continue' to proceed to the next stage of your new account setup.

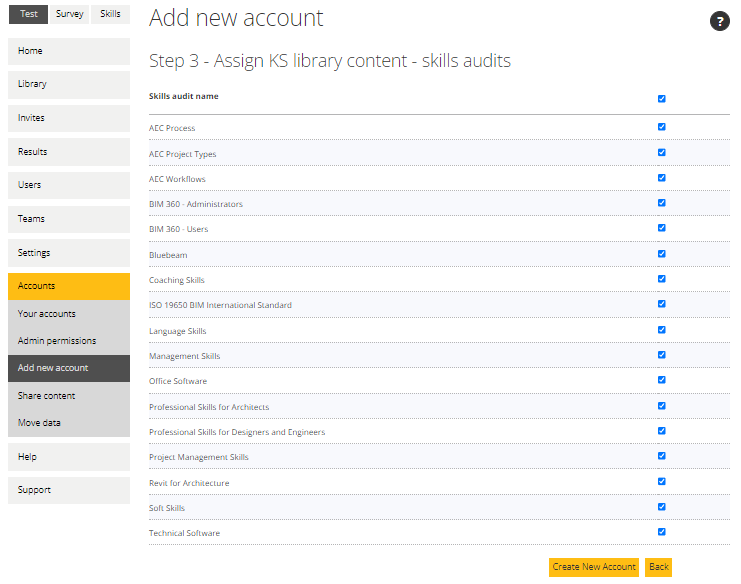
Step 3
Select which Skills audit library titles you wish to assign to your new account.
Click 'Create New Account' to complete your new account setup.
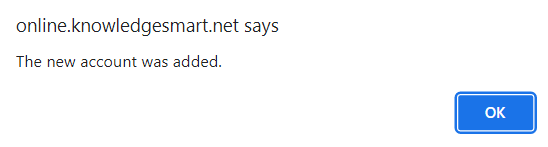
A confirmation message will display.
Viewing account hierarchy
View your list of KnowledgeSmart linked accounts, by navigating to the 'Accounts > Your accounts' page.
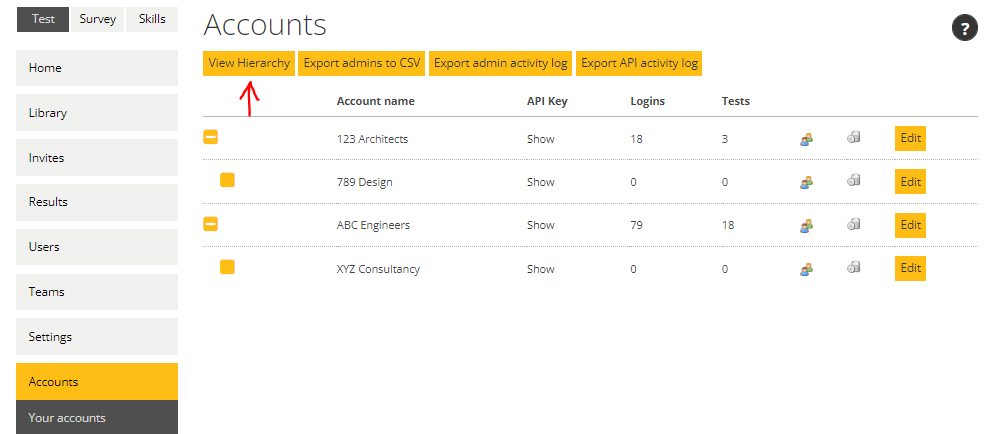
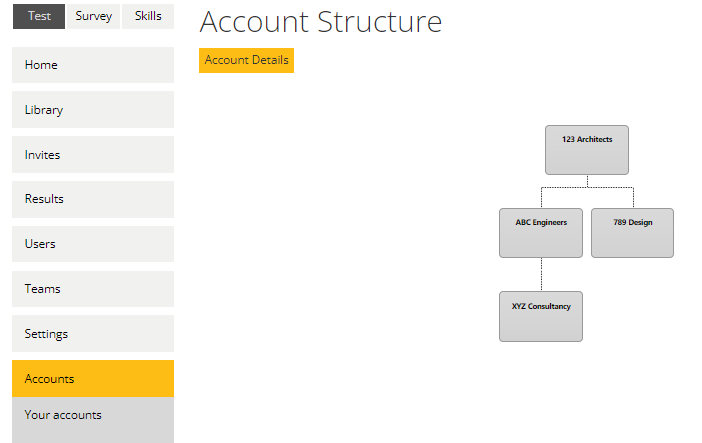
Select the 'View Hierarchy' button to see a graphical display of your linked accounts.
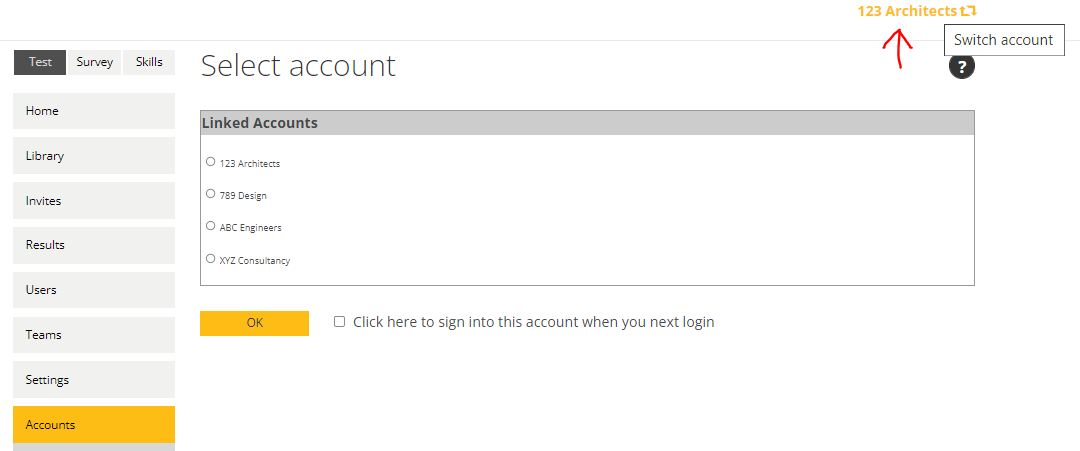
Switching between linked accounts
Use the 'Switch account' tool to navigate to a different accounts in your hierarchy.
Viewing data across linked accounts
At the top of certain dashboard pages, you will see a dropdown filter. The default setting for this filter is, 'All Linked Accounts'. This option presents a consolidated view of data on the page from all linked accounts in your hierarchy.
Use the dropdown to filter the view for the relevant parent or child account.
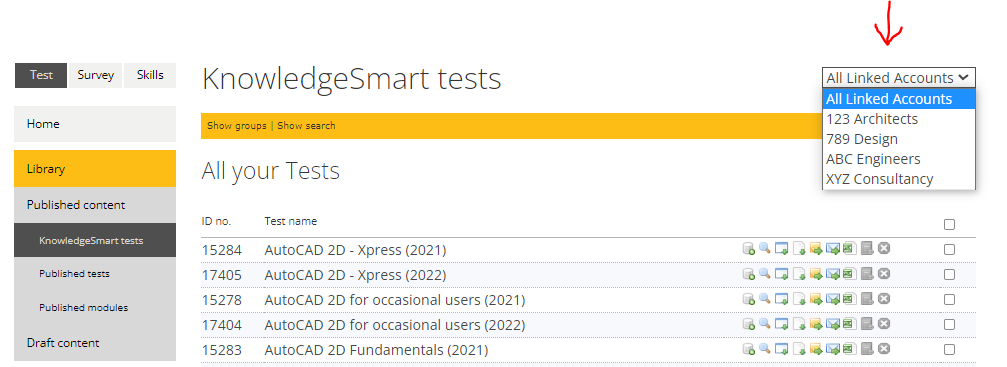
This filter appears at the top of the following dashboard pages:
- Library > Published content (KS tests, Published tests, Published test modules)
- Library > Draft content (Draft tests, Draft test modules, Draft test questions)
- Library > Published content (Published surveys, Published survey modules)
- Library > Draft content (Draft surveys, Draft survey modules, Draft survey questions)
- Library > Published content (KS Skills audits, Published Skills audits, Published Skills audit modules)
- Library > Draft content (Draft Skills audits, Draft Skills audit modules, Draft Skills audit questions)
- Invites > History (Tests, Surveys, Skills audits)
- Results > Data (Tests, Surveys, Skills audits)
- Users > User list
- Teams > Team list
Applying Settings changes to linked accounts
It is possible to copy account Settings from a parent account to one or more child accounts, at the same time.
For example, if you want to duplicate UI options across multiple linked accounts, select the 'Show linked accounts' tool in the orange bar at the top of the screen (in the parent account). Use the checkboxes to select the relevant child account(s), then click 'Save' to register your changes.
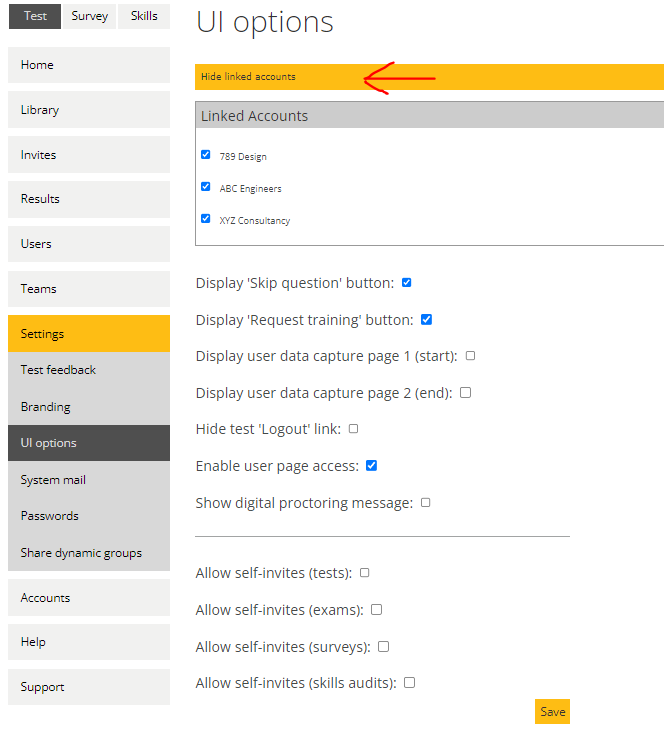
All selected child accounts will now have the same UI options Settings as the parent account.
Related Article(s):
How to login to the KnowledgeSmart Admin Area
What are the different types of KnowledgeSmart Administrator?
Exporting KnowledgeSmart Administrator data
How to move data between different KnowledgeSmart accounts